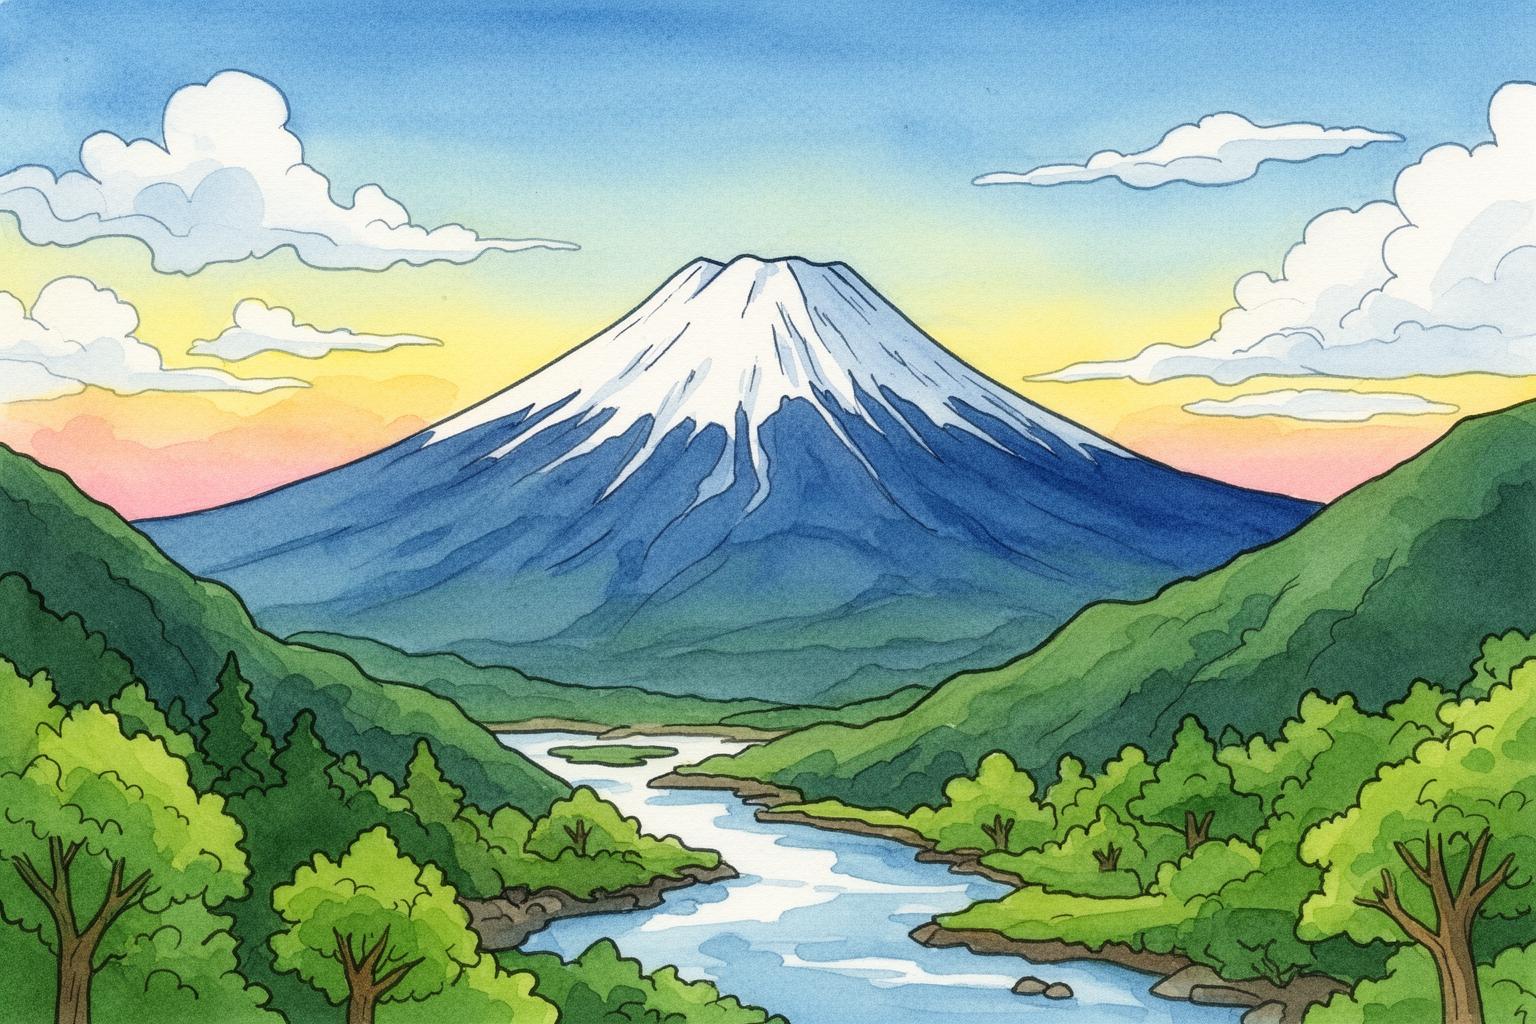
What’s up, fellow travelers! Yuki here, your go-to planner for all things Japan. Let’s talk about something epic, something that’s probably on your bucket list if you’re even thinking about visiting Japan. We’re talking about the one, the only, Mount Fuji. This isn’t just a mountain; it’s the soul of Japan, a perfectly symmetrical volcanic cone that has inspired artists, poets, and pilgrims for centuries. From a distance, it’s serene, a majestic silhouette against the sky, often capped with snow. But up close? It’s a raw, powerful, and challenging beast waiting to be conquered. Climbing Fuji-san is a rite of passage, a spiritual journey that pushes your limits and rewards you with a view that’s straight-up legendary: the goraiko, or sunrise from above the clouds. It’s a vibe you can’t get anywhere else. Straddling the prefectures of Yamanashi and Shizuoka, this UNESCO World Heritage site is more than a hike; it’s an experience that connects you to the very heart of Japanese culture. Whether you’re a seasoned hiker or just someone with a whole lot of heart, this guide is your key to making it to the top. So, lace up your boots, get hyped, and let’s get ready to climb into the sky. This is the real deal, an adventure you’ll be talking about for years to come. Let’s dive deep into everything you need to know to make your Fuji climb a legit success.
To ensure you’re fully prepared for this spiritual journey, be sure to read our ultimate beginner’s guide to climbing Mount Fuji.
The Vibe: More Than Just a Mountain
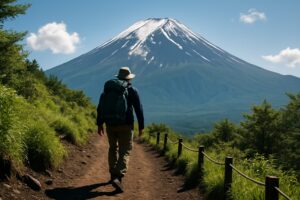
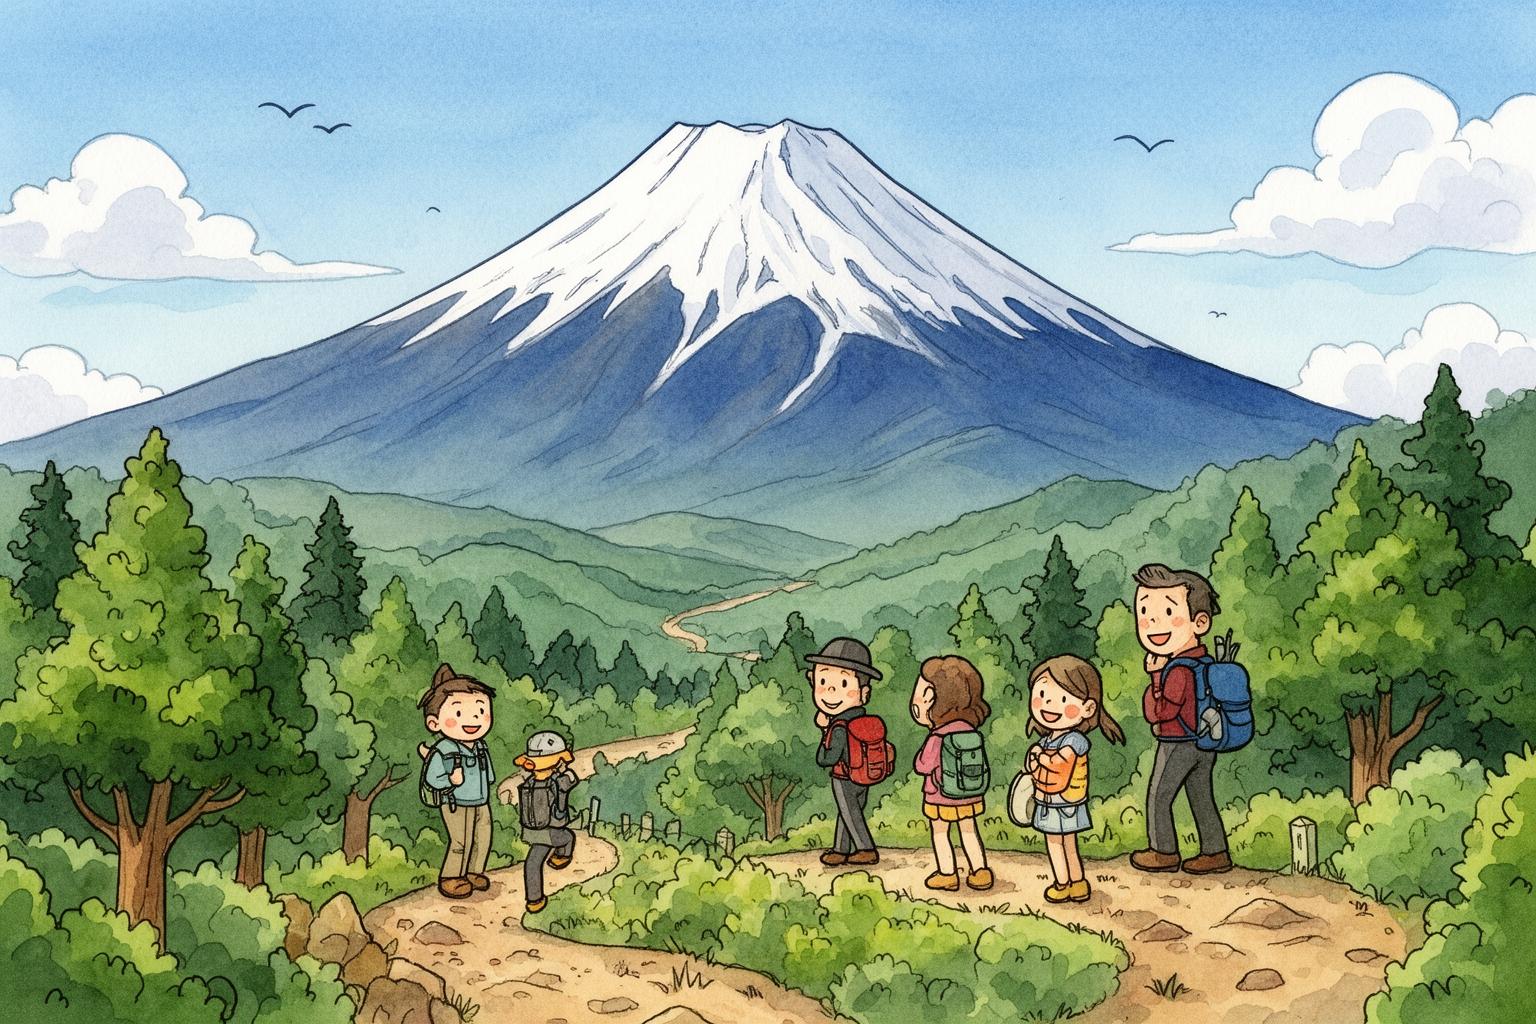
Before diving into the details of gear and trails, let’s first consider the feeling of Mount Fuji. From a distance, it looks like a picture-perfect postcard, a beauty almost too flawless to be real. It forms the backdrop for the Fuji Five Lakes and stands as the stoic guardian visible from the Shinkansen bullet train window. However, once you step onto the volcanic soil of the 5th Station, the atmosphere changes completely. The air thins, the temperature drops, and the mountain unveils its true nature: a vast, rugged expanse of reddish-brown volcanic rock and scree. It’s raw and commanding. What truly sets it apart is the sense of community on the trail. You find yourself surrounded by people from all around the globe, from young students to elderly Japanese pilgrims, all sharing the same goal. There’s an unspoken bond, a collective struggle and excitement. You’ll share weary smiles, words of encouragement like “Ganbatte!” (Do your best!), and marvel together as the world spreads out beneath you. Culturally, Fuji holds sacred significance. It has been a site of mountain worship for centuries, believed to be the home of deities. Along the path, you’ll encounter small shrines and torii gates, reminders of its sacredness. This spiritual essence is especially tangible in the pre-dawn quiet as hundreds of headlamps wind their way up the final climb to the summit. It’s not a solitary wilderness hike; it’s a communal pilgrimage. The experience melds physical effort, cultural immersion, and spiritual reflection. It’s about pushing your limits while being part of something far greater.
When to Go: Timing is Everything, Fam
Alright, this is extremely important, so pay close attention. You can’t just show up at Mount Fuji whenever you want. There is a designated, very specific climbing season. For the main Yoshida Trail on the Yamanashi side, it usually runs from early July to early September. The other three trails on the Shizuoka side (Subashiri, Gotemba, and Fujinomiya) tend to have a slightly shorter season, typically from mid-July to early September. You absolutely must check the official websites each year for exact dates, as they can change depending on snow conditions. Why is the season so short? Simply put, safety. Outside these two months, Fuji becomes a completely different challenge. It’s covered in snow and ice, subject to hurricane-force winds, and temperatures drop to deadly lows. All mountain huts, toilets, and first-aid stations are closed. Climbing off-season is extremely dangerous and only suitable for expert, fully-equipped mountaineers. For the average traveler, it’s a firm no. Don’t even consider it.
Now, let’s break down the official season. Early July can be a great time to climb since it’s less crowded, but there’s a greater chance of lingering snow patches and rainy weather as it marks the end of Japan’s rainy season. From late July through August, the weather tends to be more stable; however, this is peak season. Trails, especially the popular Yoshida Trail, can get extremely crowded, particularly on weekends and during the Obon holiday in mid-August. If possible, aim for a weekday climb in late July or the last week of August to find a balance between good weather and fewer crowds. The phrase “human traffic jam” is no exaggeration on a Saturday night in August—you might find yourself lined up just to keep moving up the trail. Strategically planning your dates is your first big step toward successfully conquering Fuji.
Picking Your Path: The Four Fuji Trails
Selecting your route is a crucial decision. There are four primary trails to the summit, each beginning from a different 5th Station (the highest drivable point). They differ significantly in difficulty, length, and atmosphere. Let’s dive into the specifics so you can choose the best one for your group.
The Yoshida Trail (Yamanashi Prefecture)
This is the flagship route, the main attraction, used by over half of all climbers. It’s the most developed and often considered the “easiest,” but don’t be misled—it remains a serious climb.
- Access: Reachable via the Fuji-Subaru Line 5th Station, which is easily accessible by direct bus from Tokyo’s Shinjuku or Kawaguchiko Station.
- The Vibe: Bustling and lively. The 5th Station functions like a small town with shops, restaurants, and a shrine. The trail is wide and well-marked, with the major advantage being the numerous mountain huts spaced almost at every station, providing ample breaks, snacks, and emergency aid. Separate ascending and descending paths for most of the route also help handle the crowds.
- The Climb: The route starts off relatively gentle, becoming progressively steeper and rockier after the 7th Station. The last stretch from the 8th Station to the summit is a steep, demanding scramble over volcanic rock. The average ascent takes about 6-7 hours.
- The Downside: Crowds, crowds, and more crowds. Congestion near the summit before sunrise is a real challenge, often slowing progress and causing frustration. The descent is a long, monotonous series of switchbacks on loose gravel, tough on the knees and often considered harder than the ascent.
- Best For: First-timers, solo climbers who want the security of numbers, and those who value access to amenities.
The Subashiri Trail (Shizuoka Prefecture)
For a slightly more rustic experience without stepping into expert territory, the Subashiri Trail is an excellent option.
- Access: Begins at the Subashiri 5th Station, accessible by bus from Gotemba Station.
- The Vibe: A personal favorite; the initial part of the climb passes through a serene forest providing welcome shade from the sun. It’s much less crowded than the Yoshida Trail until joining it at the 8th Station.
- The Climb: Early on, the ascent is a bit more demanding than Yoshida’s. The descent is the highlight, featuring the famous sunabashiri or “sand run,” a steep volcanic gravel slope you can literally run or bound down, covering ground quickly and having a lot more fun than the Yoshida descent.
- The Downside: Fewer mountain huts mean you need to be more self-reliant. Once merged with Yoshida, you’ll face bigger crowds for the final push.
- Best For: Hikers with some experience, those seeking a quieter start, and fans of the sand-run descent.
The Gotemba Trail (Shizuoka Prefecture)
This is the most demanding trail — the longest, toughest, and least crowded way up. Only attempt this if you’re a fit, seasoned hiker.
- Access: Starts at Gotemba 5th Station, the lowest of the four (~1,400 meters), reachable by bus from Gotemba Station.
- The Vibe: Solitude reigns. For long stretches, it may feel like the mountain is all yours. The landscape is vast and stark, made up of extensive volcanic scree slopes, which can be awe-inspiring but also disorienting in fog or darkness.
- The Climb: A grueling endurance test, taking 8-10 hours with a huge elevation gain. Mountain huts are scarce, so bring sufficient food and water. The scenery is less varied until higher elevations.
- The Downside: Its difficulty is the biggest drawback. The limited huts and isolation increase risk, especially if you encounter bad weather or get lost.
- Best For: Highly experienced, physically fit hikers seeking a serious challenge and total avoidance of crowds.
The Fujinomiya Trail (Shizuoka Prefecture)
This is the shortest route distance-wise, but also one of the steepest. It’s the second most popular trail and the main route from western Japan.
- Access: Begins at Fujinomiya 5th Station, the highest of all (~2,400 meters), giving a head start on altitude. Easily reached by bus from Mishima, Shin-Fuji, and Fujinomiya stations.
- The Vibe: A direct, no-frills climb. The trail is rocky and steep throughout. It’s popular with climbers from cities like Nagoya and Osaka.
- The Climb: Being the shortest, the ascent can be completed in about 5-6 hours. However, the continuous steepness turns it into a demanding, quad-burning workout. The trail is used for both ascent and descent, resulting in two-way traffic.
- The Downside: The rocky, steep terrain is tough and there’s a higher risk of rockfalls. Located on the western face, you don’t see the sunrise until reaching the summit crater, unlike eastern trails where it’s visible earlier.
- Best For: Strong hikers aiming for the quickest route to the top, especially those traveling from western Japan.
The Climb Itself: A Step-by-Step Vibe Check
Climbing Fuji isn’t a sprint; it’s a marathon. How you pace yourself and organize your climb will determine both your success and your well-being. First, let’s address a major mistake: “bullet climbing,” or dangan tozan. This involves starting your climb in the evening from the 5th station and hiking through the entire night to reach the summit at sunrise without stopping to sleep in a hut. While it may seem efficient, it is strongly discouraged and officially advised against. It’s a recipe for disaster. The rapid ascent leaves no time for your body to acclimate, greatly increasing the risk of severe altitude sickness. It also causes exhaustion, impaired judgment, and a much greater chance of accidents in the dark. Plus, you’ll be so drained at the summit that you won’t even enjoy the sunrise. Simply put, don’t do it.
The proper, safe, and much more enjoyable approach is the two-day method with an overnight stay in a mountain hut.
Day 1: The Ascent to Your Hut
Your journey begins at your chosen 5th Station. Don’t rush. The golden rule of high-altitude climbing is to acclimatize. Spend at least an hour, preferably two, at the 5th station. Walk around, eat a light meal, drink plenty of water, and let your body adjust to the thinner air. This is likely the most important step to prevent altitude sickness.
Around midday or early afternoon, you’ll begin your ascent. The goal of Day 1 isn’t the summit; it’s the mountain hut you’ve reserved, usually around the 7th or 8th station. Maintain a slow and steady pace—really, take it at a snail’s speed. If you’re out of breath, you’re moving too fast. The mountain rule is to walk at a pace that allows you to hold a conversation. As you climb, the scenery shifts. You’ll leave the last of the trees behind and enter a volcanic rock landscape. The views below become more spectacular. You’ll reach your hut in late afternoon or early evening. Dinner is typically served early—a simple but hearty meal like curry rice. After dinner, you’ll be shown to your sleeping area. It’s basic and crowded, but even a few hours of sleep are essential. Aim to be in bed by 8 or 9 PM.
Day 2: The Final Push and Glorious Descent
The wake-up call comes painfully early, usually between 1 and 2 AM. You’ll bundle up, grab your gear, and join the stream of headlamps making the final push to the summit in the cold and darkness. This is the steepest and most demanding part of the climb. The air is thin, and every step requires effort. Yet the energy is electric. Surrounded by the quiet determination of fellow climbers, a shared sense of purpose lights the way.
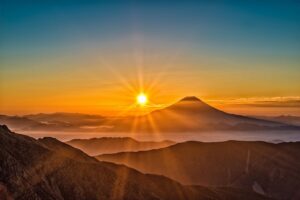
Your reward awaits as you reach the summit just before dawn. Find a spot, bundle up in your warmest layers, and wait. Then it happens. The sky glows orange and purple, the sun peeks over the horizon, and the world below unfolds as a sea of clouds (unkai). This is the goraiko. It’s a breathtaking, almost spiritual experience. The freezing cold and exhaustion melt away in that moment. You did it.
After enjoying the sunrise, don’t rush the descent. Take time to explore the summit! You can do the ohachi-meguri, a 90-minute walk around the massive crater. This takes you to Kengamine Peak, the true highest point in Japan at 3,776 meters. There’s also a shrine and the famous Mount Fuji post office, where you can send a postcard bearing a special postmark from Japan’s summit. When you’re ready, start the long journey down. The descent is often underestimated. It’s tough on your joints, especially knees, and on loose gravel, slipping is easy. Take it slow, use hiking poles, and stay alert. When you finally reach the 5th Station again, the sense of achievement is overwhelming. You’ll be tired, dusty, but filled with pride.
Gearing Up: What to Pack, For Real
Having the right gear is essential. The weather on Fuji is famously unpredictable, capable of shifting instantly from sunny and calm to freezing rain and gale-force winds. You must be ready to face all four seasons in a single day.
Clothing (Layering is Key)
- Base Layer: A moisture-wicking shirt (synthetic or wool, NEVER cotton). Cotton traps sweat and will leave you dangerously cold once you stop moving.
- Mid Layer: A fleece jacket or lightweight down vest for insulation.
- Outer Shell: A top-quality, waterproof, and windproof jacket and pants. This is your most critical gear. A cheap plastic poncho won’t withstand strong winds and will quickly fall apart. It must be built for severe weather.
- Pants: Comfortable hiking pants; zip-off pants that convert to shorts work well for the early part of the climb.
- Socks: High-quality hiking socks (wool or synthetic). Bring at least one extra pair. Wet socks cause blisters and misery.
- Summit Warmth: A warm hat or beanie and gloves are absolutely necessary. Even in August, temperatures can drop below freezing at the summit, especially with wind chill.
Footwear
- Hiking Boots: Durable, waterproof boots with good ankle support are a necessity. Sneakers are not suitable. Make sure your boots are well broken-in to prevent blisters.
- Gaiters: These fabric covers fit over your boots and lower pants and are invaluable on the descent, keeping volcanic pebbles and dust out of your boots.
Essential Equipment
- Backpack: A comfortable 25-40 liter pack with a rain cover.
- Headlamp: Crucial for the pre-dawn climb. Bring spare batteries just in case.
- Hiking Poles: Your best allies for knee protection during the descent and stability while ascending.
- Sun Protection: The sun is intense at high altitude. Bring sunglasses, high-SPF sunscreen, and a wide-brimmed hat or cap.
Food, Water, and Money
- Water: Carry at least 2 liters per person from the start. You can buy more at mountain huts but expect steep prices (around 500 yen for a small bottle). Staying well hydrated is vital to prevent altitude sickness.
- Snacks: Opt for high-energy snacks like trail mix, chocolate, energy bars, and salty snacks to replenish electrolytes.
- Cash: Mount Fuji operates mostly on cash. Huts, toilets, and vendors rarely accept credit cards. Bring plenty of yen, especially 100-yen coins for toilets, which cost 100-300 yen per use.
- Trash Bag: There are no trash bins on the mountain. You must carry all your trash back down. Leave no trace.
Altitude Sickness: The Real Boss Battle
Altitude sickness, or takayamabyo, is the primary reason people fail to reach the summit. It can affect anyone, regardless of age or fitness. It results from ascending too quickly to high elevations where the air contains less oxygen. Symptoms can range from mild (headache, nausea, dizziness, fatigue) to severe and life-threatening (confusion, difficulty breathing). Prevention is crucial.
- Acclimatize: As noted earlier, spend at least an hour at the 5th Station before beginning your climb.
- Go Slow: This is the most important guideline. Climb at a pace that feels comfortable and doesn’t leave you breathless.
- Hydrate: Drink plenty of water regularly and in small sips.
- Take Breaks: Rest frequently. Each station is an opportunity to sit and catch your breath.
- Breathe Deeply: Make a conscious effort to take slow, deep breaths to increase oxygen intake.
- Stay Overnight: A two-day climb with an overnight stay at the 7th or 8th station hut allows your body to adjust gradually.
If symptoms appear, stop ascending. Rest and see if they improve. If they worsen, the only remedy is to descend to a lower altitude immediately. Do not try to “push through” the symptoms. Your health is more important than reaching the summit.
Mountain Huts (Yamagoya): Your High-Altitude Sanctuary
Mountain huts, or yamagoya, form the core of the Fuji climbing experience. These are not hotels but simple shelters offering a place to rest, eat, and sleep. Booking in advance is absolutely necessary, especially if you plan to climb on a weekend. Reservations typically open online around April or May for the upcoming season. A usual stay costs between 7,000 and 10,000 yen per person and includes a basic dinner and breakfast (often a bento box to go). Sleeping arrangements are communal, with climbers sharing a large room and sleeping side-by-side in sleeping bags or on futons. It’s cramped, there will be snoring, but that’s all part of the experience. The huts provide a great place to warm up, refuel, and chat with other climbers. Remember to respect the shared space and keep noise to a minimum. And don’t forget—cash only!
The Summit Experience: You Made It!
The summit of Mount Fuji feels like stepping onto another planet. It features a vast caldera, roughly 800 meters wide, with a stark, beautiful, and windswept terrain. The sunrise, known as goraiko, is the highlight, and it truly lives up to the anticipation. Watching the sun rise above a sea of clouds is a cherished memory you’ll hold forever. But the summit has more to offer. The Ohachi-meguri, or crater circuit, is a must if you’re energetic and the weather is favorable. This 90-minute trek around the crater’s rim provides breathtaking 360-degree views and leads to Kengamine Peak, the highest point in all of Japan. Standing there, you can feel the wind whipping around you, literally on top of the country. You can also visit the Fujisan Hongu Sengen Taisha Okumiya shrine at the summit and receive a special stamp (goshuin) to mark your pilgrimage. And of course, sending a postcard from Japan’s highest post office is the ultimate brag. Just be ready for the cold. Even on a sunny summer day, temperatures at 3,776 meters often hover near freezing, and the wind can be unrelenting. Have your warmest layers ready to put on as soon as you arrive.
Access & Logistics: Getting to the Starting Line
Reaching the trailheads is easy thanks to Japan’s excellent public transportation system. During the climbing season, private vehicles are restricted on the roads leading to the 5th stations to avoid traffic congestion, so buses remain the best and only option.
- For the Yoshida Trail (Yamanashi Side): The simplest way from Tokyo is to take a direct highway bus from Shinjuku Bus Terminal (Busta Shinjuku) straight to the Fuji-Subaru Line 5th Station, which takes about 2.5 hours. Alternatively, you can take a train to Kawaguchiko Station and then transfer to one of the frequent shuttle buses running up to the 5th Station.
- For the Shizuoka Side Trails (Fujinomiya, Subashiri, Gotemba): Access usually involves a major Shinkansen (bullet train) station followed by a shuttle bus. For the Fujinomiya Trail, take a train to Mishima, Shin-Fuji, or Fujinomiya station. For the Subashiri and Gotemba trails, go to Gotemba Station. From each station, dedicated climbing buses will transport you to the corresponding 5th Station. Be sure to check bus schedules in advance since they vary by trail and time of day.
For lodging before or after your climb, the Fuji Five Lakes area (particularly around Lake Kawaguchiko) on the Yamanashi side is excellent. It offers numerous hotels, ryokans, and onsen (hot springs) where you can relax sore muscles while enjoying a stunning view of the mountain you’ve just conquered. On the Shizuoka side, towns like Fujinomiya and Gotemba provide convenient accommodation options.
Fuji Etiquette & Pro Tips: The IYKYK Guide
Climbing Fuji involves a few unwritten rules and helpful tips that will make your experience smoother and more respectful.
- Greetings Matter: While hiking, it’s customary to greet fellow climbers. Say “Konnichiwa” (hello) during the day and “Ohayo gozaimasu” (good morning) during the early morning summit push. It fosters a strong sense of community.
- Uphill Climbers Have Priority: If you’re descending and encounter someone climbing up on a narrow path, step aside to let them pass. Going uphill requires more effort!
- Leave No Trace: This is crucial. There are no trash bins on the mountain, so you must carry all your garbage back down with you, including food wrappers, plastic bottles, and everything else. Pack it in, pack it out.
- Stay on the Trail: The mountain’s environment is delicate. Remain on marked trails to prevent erosion and protect the fragile alpine plants.
- Respect the Toilets: Most toilets on the mountain are ecological or bio-toilets. Follow the posted instructions and always have 100-yen coins ready, as they operate on a pay-per-use basis.
- Keep Your Devices Charged: The cold quickly drains phone batteries. Bring a portable power bank to keep your phone charged for photos and emergencies, and store it in an inside pocket close to your body to keep it warm.
Beyond the Climb: Chilling in the Fuji Five Lakes & Shizuoka
Don’t just climb Mount Fuji and leave! The surrounding regions in both Yamanashi and Shizuoka are amazing and provide the perfect way to relax after your adventure.
On the Yamanashi side, the Fuji Five Lakes area is a true resort paradise. Bathing in an onsen with an unobstructed view of Mount Fuji is an unforgettable experience. Explore the area around Lake Kawaguchiko for some of the best views and traditional ryokans. For that iconic, postcard-perfect image of Fuji framed with a five-storied pagoda, visit the Chureito Pagoda in Arakurayama Sengen Park. You can also enjoy cycling, boating, and discovering the various caves and forests surrounding the lakes.
On the Shizuoka side, you can immerse yourself in the spiritual heritage of the mountain. Visit the Fujisan Hongu Sengen Taisha in Fujinomiya, the main shrine among over 1,300 Sengen shrines throughout Japan dedicated to the deity of Mount Fuji. The nearby Shiraito Falls are breathtaking—a wide curtain of water flowing over a volcanic rock face. For a classic seascape view of Fuji, go to Miho no Matsubara, a pine-covered beach that has been immortalized in famous ukiyo-e woodblock prints for centuries.
A Final Word
Climbing Mount Fuji is much more than simply checking an item off your list. It’s a challenge that tests your body and spirit and a journey that rewards you with an unmatched sense of accomplishment. It’s about the shared struggle with strangers who become friends on the trail, the humility felt in the presence of nature’s power, and the pure, unfiltered joy of witnessing the sunrise from Japan’s highest peak. It’s tough, it’s exhausting, but it’s an experience that will stay with you forever. So plan carefully, pack wisely, respect the mountain, and create a memory etched against the rising sun. You’ve got this.